
5 Uploading Files to ICON
Uploading files to your ICON site is very simple once you get the hang of it. This chapter will guide you through the process of adding files to your ICON site.
Tip: Have your files ready to go when you start this process. It will make the upload smoother to have the files in a known location.
The first step is to navigate to your Files tab on the left-side navigation bar. This is where you will manage the files you have stored on this course site.
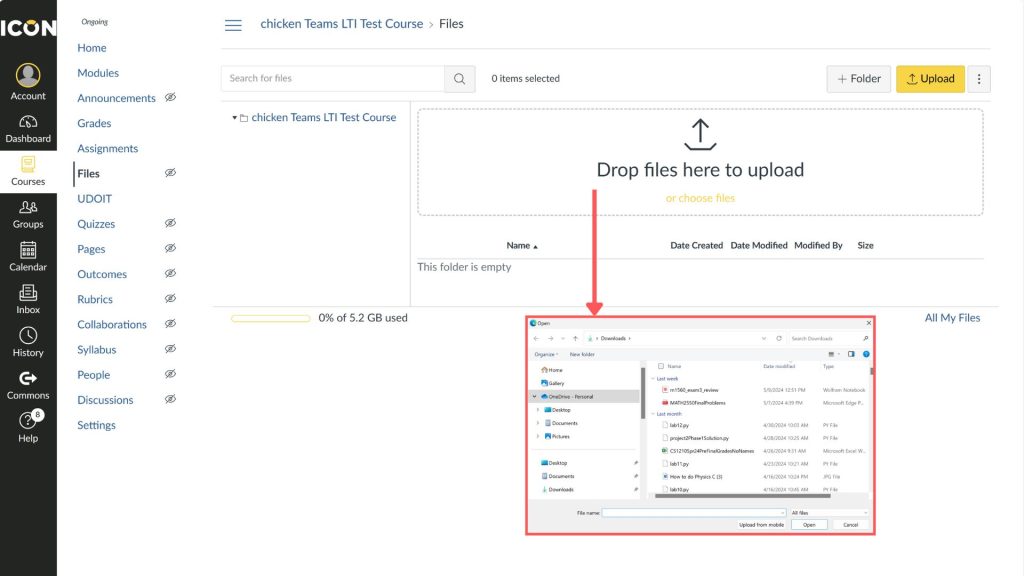
If you have never added a file to your course site your files page will look like this. You can either drag and drop the files to the referenced box on the screen, or you can click on the or choose files link. This link will prompt you to select a file via your computers file explorer or finder as demonstrated below.
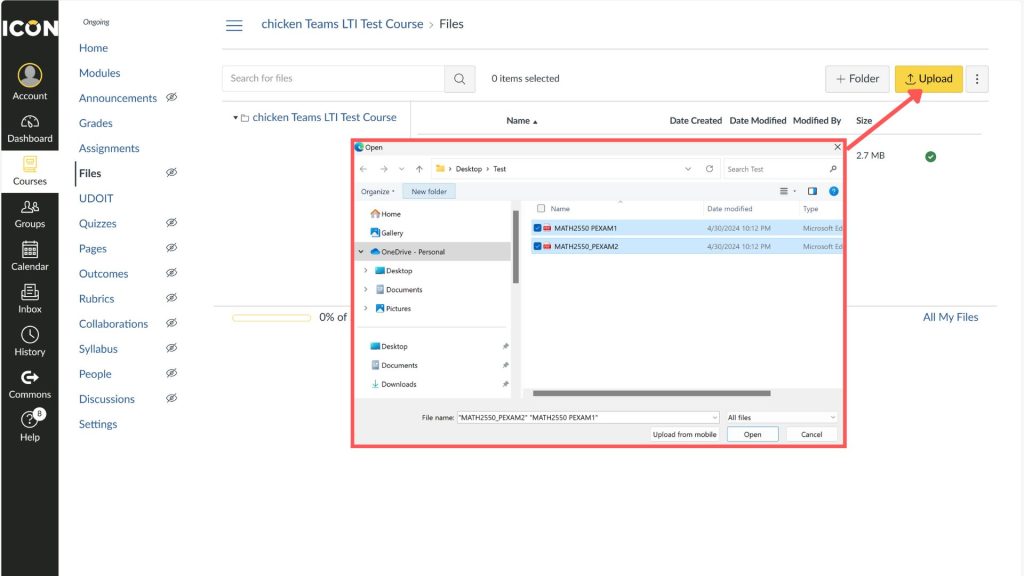
Once you have files in your course you will have a slightly different screen, but the process will generally remain the same. For any additional files, you will need to click the yellow upload button in the upper right corner of the page. You will then be prompted with the file explorer/finder to select a file to upload.
Tip: As shown in the following example, you can select multiple files at once for upload to ICON. You just select the files using the checkboxes and all of them will be uploaded for you.
That’s it for uploading files. Continue reading for other tips on managing your files within ICON:
Organization of Files
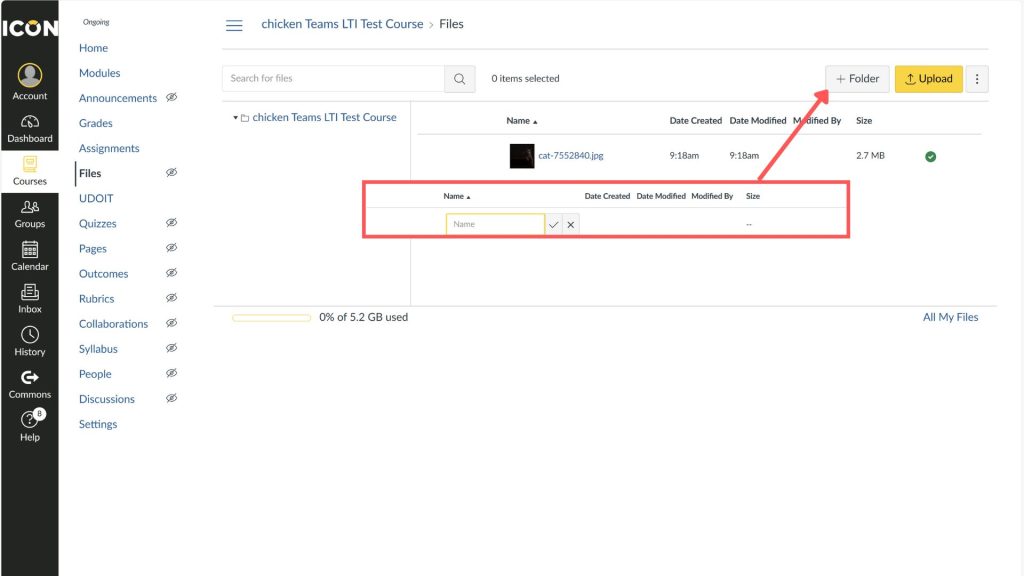
In your ICON page you can create folders to organize your files in the Files navigation menu. To do this, you click on the gray + Folder button in the upper right. You will then be prompted with a text field to enter the name of the folder. To finish click the checkmark to the right of the text box. To abandon the folder, click the X.
To use the folder, you can use two methods. The first is the easy drag and drop where you can click on a file and drag it into the folder. Another option is to select the three dots on the right of the file and use the menu to select the Move To… feature.
Modifying Permissions
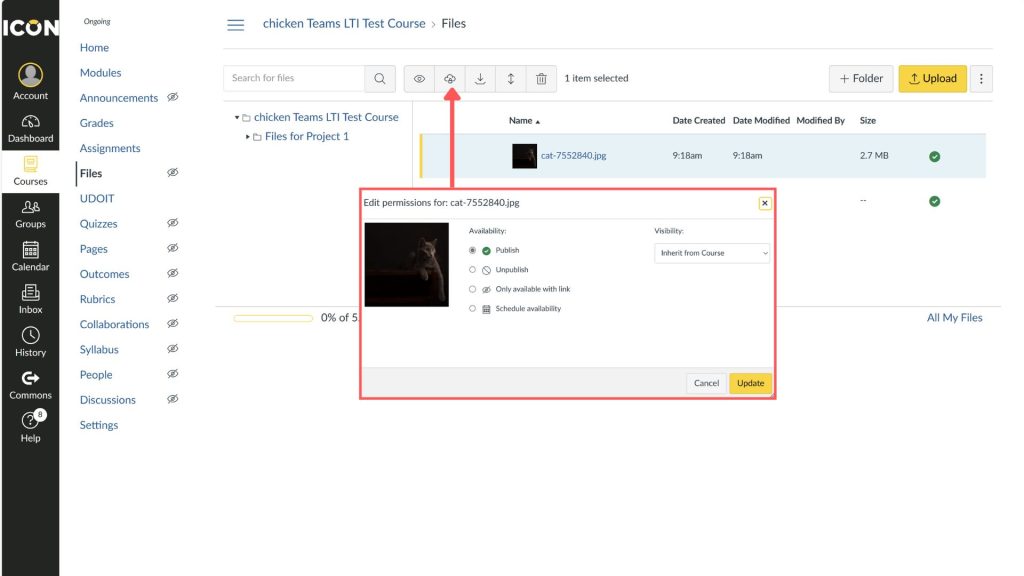
ICON provides a simple way to modify file permissions right in files menu. Once you have the file selected in the file browser – it will light up blue – you will notice a set of five square buttons appear in the upper center of the page. The second of which allows you to publish and unpublish the course, schedule availability, and set the visibility of the file.
Tip: You can also remove “Files” from the left-hand navigation so that students cannot view the files without it being linked in an assignment or module. This will make a small eye with a line through it appear by “Files” but will not restrict your access.
Using Course Files in ICON
To use your uploaded files in a rich text editor, use the dropdown below insert to select the file type then Course that file type. In this case, an image was uploaded and then Insert > Image > Course Images, was selected. This process produces a sidebar that will open to let you select a file you have previously uploaded to ICON.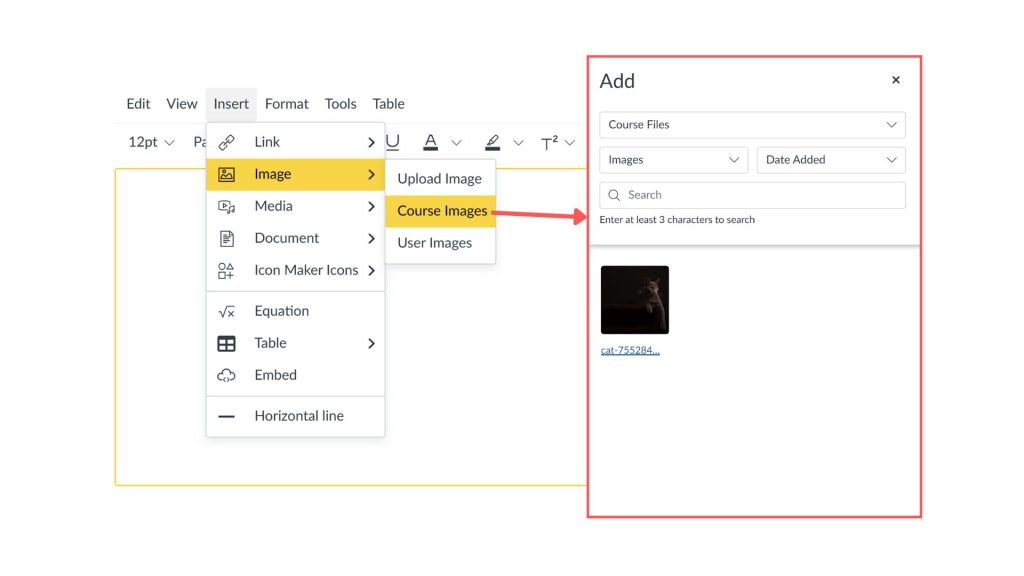
Congratulations! Now you can upload and organize your files.
Helpful Resources
From the Canvas help site:
Still have questions? Book consultation with a SITA!
SITAs work one-on-one with instructors on projects that enhance instruction with technology. We’re with the Office of Teaching, Learning, and Technology, which provides expertise, tools, and services to optimize teaching and learning through learning sciences research, ICON, teaching and learning data, and advanced classroom and instructional technology.
You can schedule an appointment or email us at sita@uiowa.edu.