
9 Making Announcements
Making announcements via ICON is a great way to share information that might not fit within an assignment with your students. Some examples of this might be a reminder about a review session before a midterm exam or a link to resources you think would be helpful for an upcoming assignment. Announcements are a key tool in ICON and this guide will teach you how to utilize this feature.
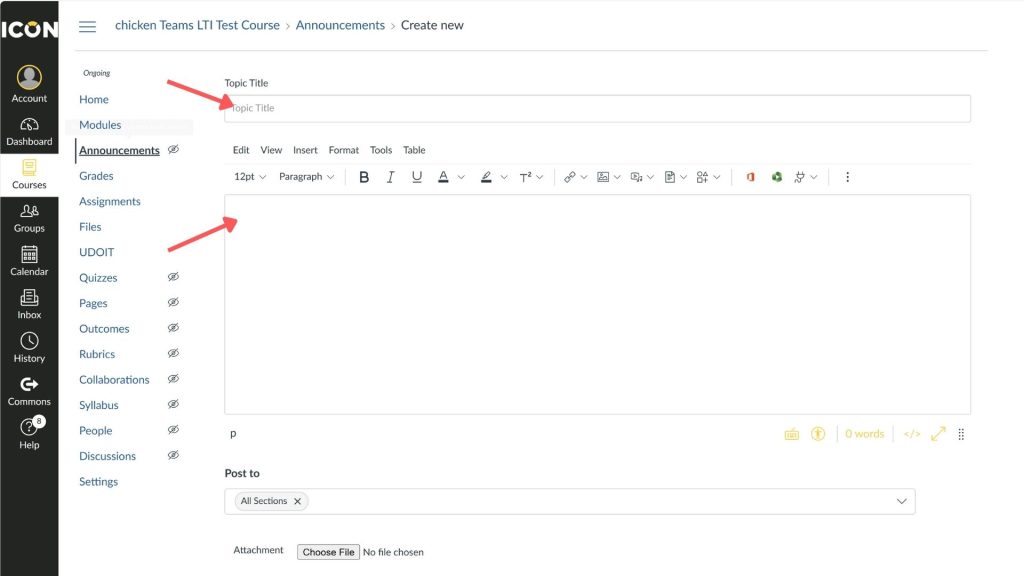
To make your first announcement open the announcements tab on the left-hand navigation. You will then click on the yellow button in the upper right to start a new announcement.

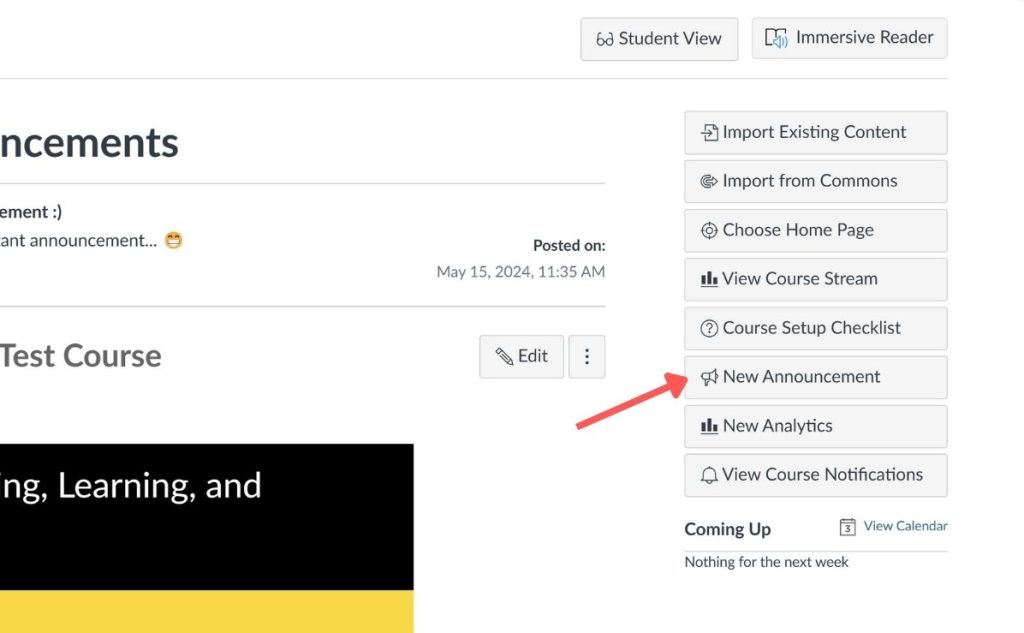
Tip: There is another option for creating an announcement located on the homepage. It is located on the right side.
Once you have clicked the create announcement button, you will be presented a screen containing a rich text editor. You will need to enter a title and some content for your announcement. The rich text editor is where the bulk of the information should go. The title should be concise and clear.
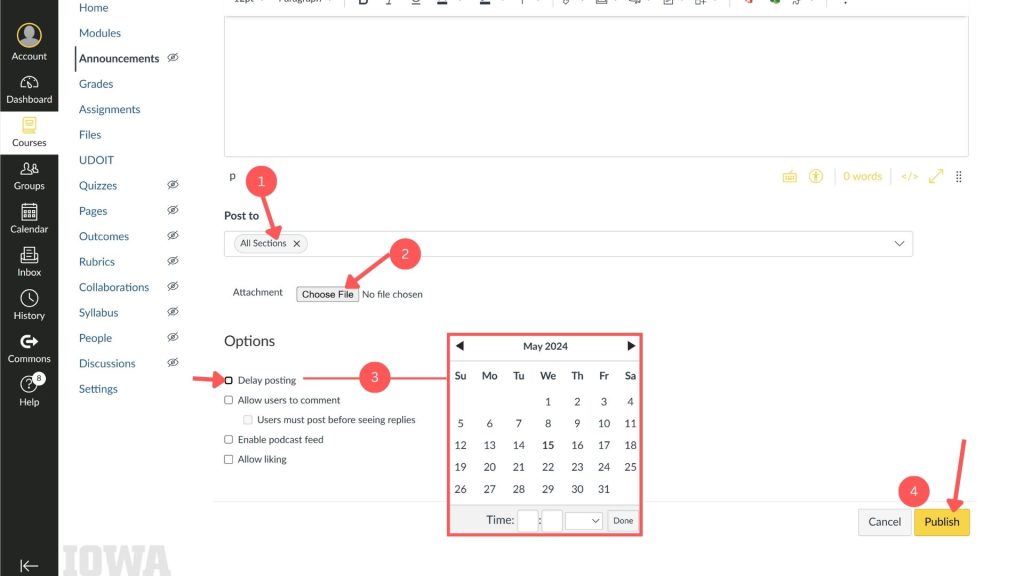
Once you have entered the title and announcement content, you can scroll down to manipulate other aspects of the announcement.
- The first arrow references a dropdown menu where you may select the announcement to only go out to certain sections of your class. This is a useful feature to make sure the right information reaches the right students.
- The second arrow presents where you can add files to the announcement outside of the rich text editor, perhaps a PDF containing some information regarding the upcoming exam that you do not want to rewrite into an announcement because of formatting errors.
- Three is detailing the Delay Posting option. This option, when selected, opens a window where you can select a date and time for the announcement to go out. This could be useful if you write the announcement far in advance but know that students may forget about the announcement by time it is relevant, therefore you can schedule the announcement to go out when it will be most useful for your students.
- Finally, four is labeling the Publish button. This button is the most important of all of the buttons. In order for the announcement to get sent, you must click this button.
To Make Announcements Appear on the Homepage
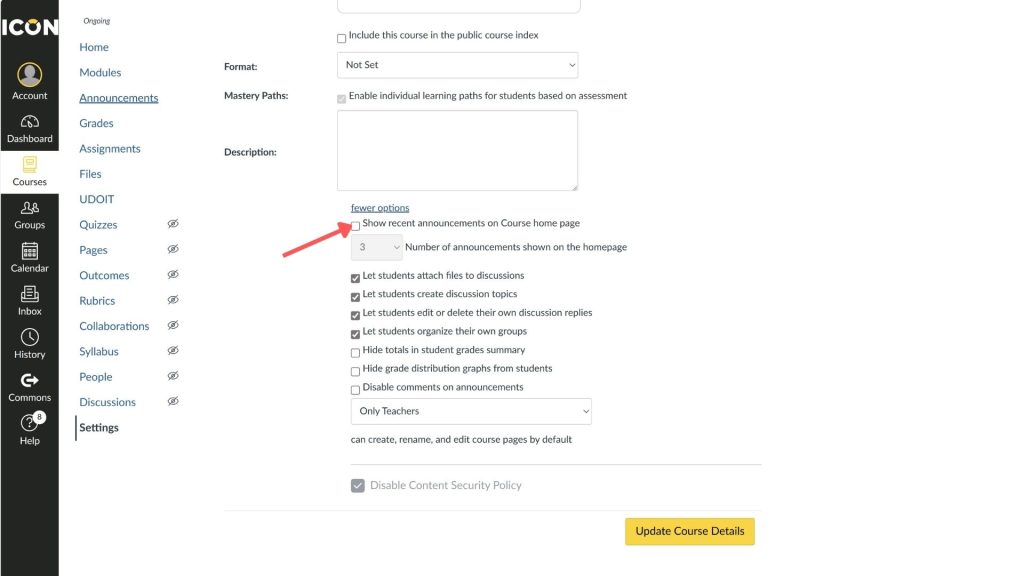
First open the settings tab on the left-hand navigation bar. Then stay on the course settings tab. Once you have scrolled to the bottom you will find a blue link saying more options. Click this link.

Then the first checkbox that appears underneath it is the one you will be selecting. You can also modify the number in the dropdown. Remember to click Update Course Details when you are done.
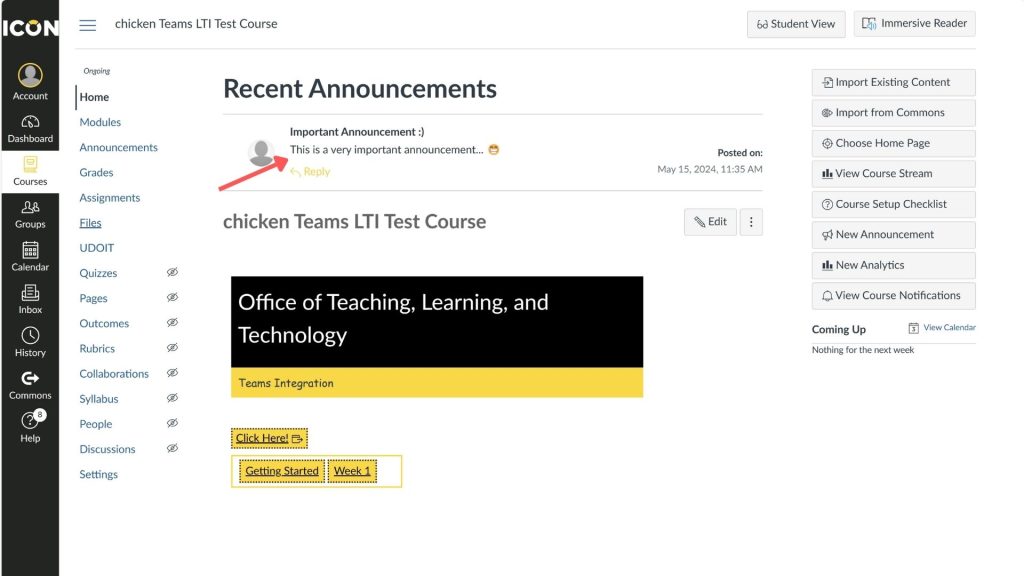
Now that you have checked that box in the settings your announcements will appear at the top of your home page, as displayed below.
Helpful Resources
From the Canvas help site:
Still have questions? Book consultation with a SITA!
SITAs work one-on-one with instructors on projects that enhance instruction with technology. We’re with the Office of Teaching, Learning, and Technology, which provides expertise, tools, and services to optimize teaching and learning through learning sciences research, ICON, teaching and learning data, and advanced classroom and instructional technology.
You can schedule an appointment or email us at sita@uiowa.edu.