
14 Options for Q&A Forums
Setting up a clear route for communication is an important step in setting up your ICON site. In this chapter, we will cover a few ways to set up Q&A forums, through ICON and by other means.
- ICON Discussions
- Top Hat Discussions
- Padlet
ICON Discussions
To use ICON’s discussion feature, navigate to the discussions tab on the left-side navigation menu. From there, you have access to a button labeled +Discussion in the upper right corner of the page. In the image below, this button is indicated to with a red arrow.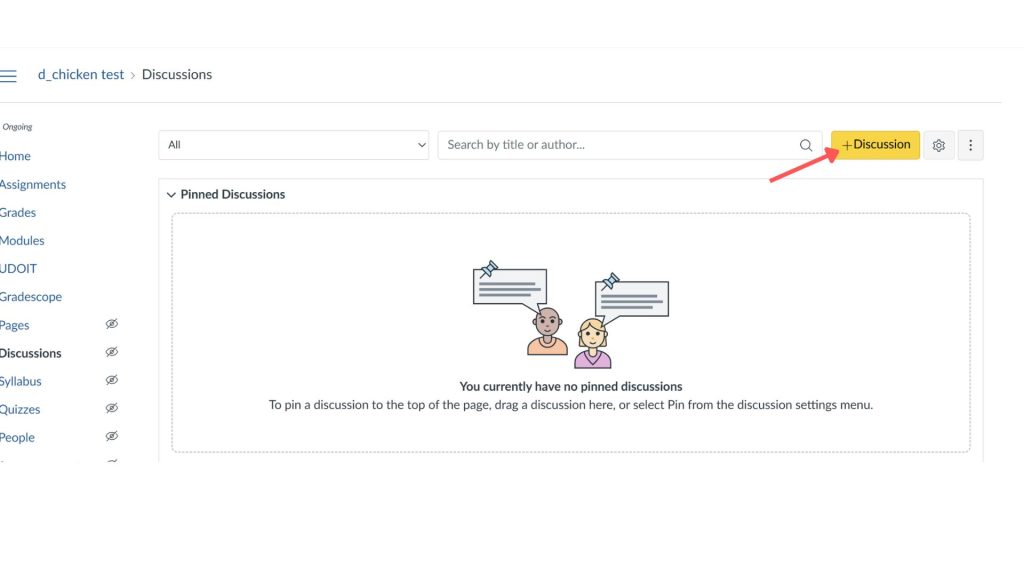
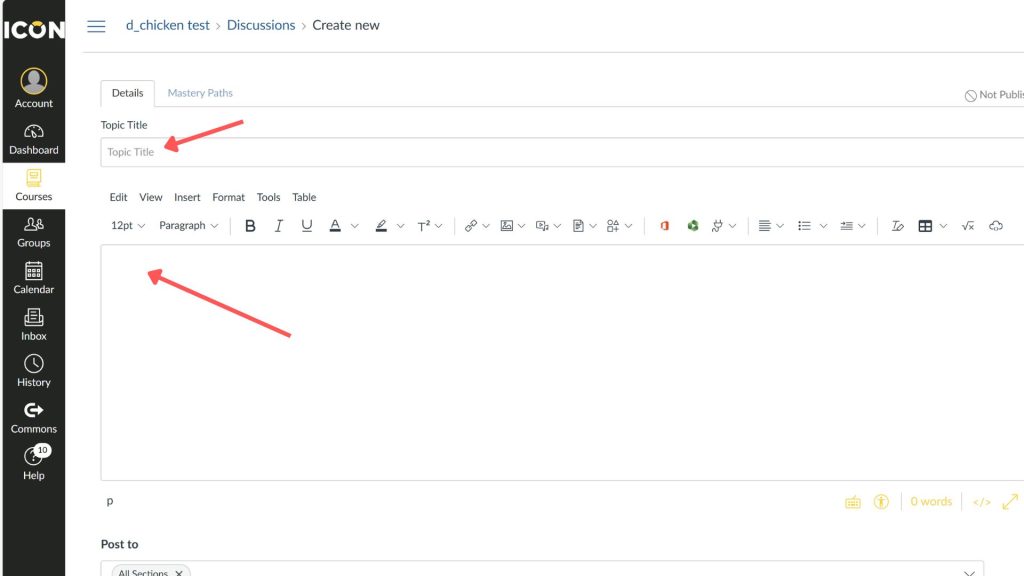
After clicking the add discussion button, you will be greeted by a page a lot like the assignment creation page in ICON. There will be two main fields to complete: a title field and a rich text editor for the discussion description.
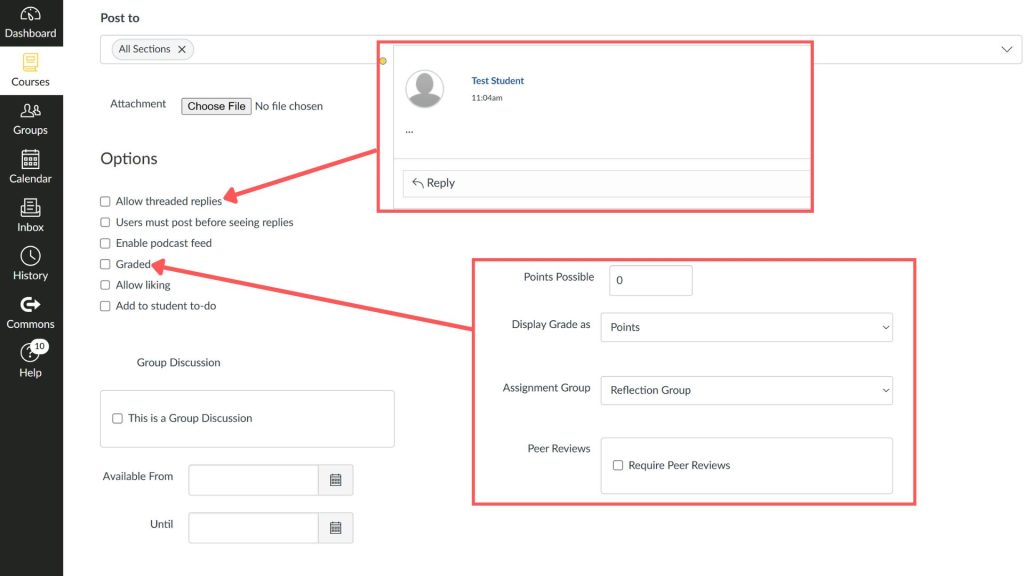
Once you have completed those two fields, you can scroll down on the page for more options concerning the discussion. For the purpose of a Q&A, question and answer, we recommend checking the “Allow threaded replies” box. Without this option enabled, the questions posed in the discussion would not be able to be responded to.
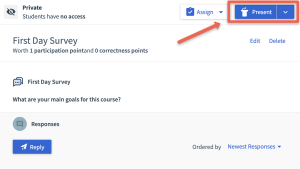
The other option we would like to draw attention to is the Graded checkbox. In the case of a weekly Q&A where you might have the expectation of students to always have posed a question (communicate this expectation of course) this could be a good option to have enabled. An example of the options you receive are shown below, including point value and assignment group. However, if you prefer a more extended Q&A approach that focuses solely on communication when students require it, enabling this feature may not be as beneficial.
You must then of course save or save and publish the discussion.
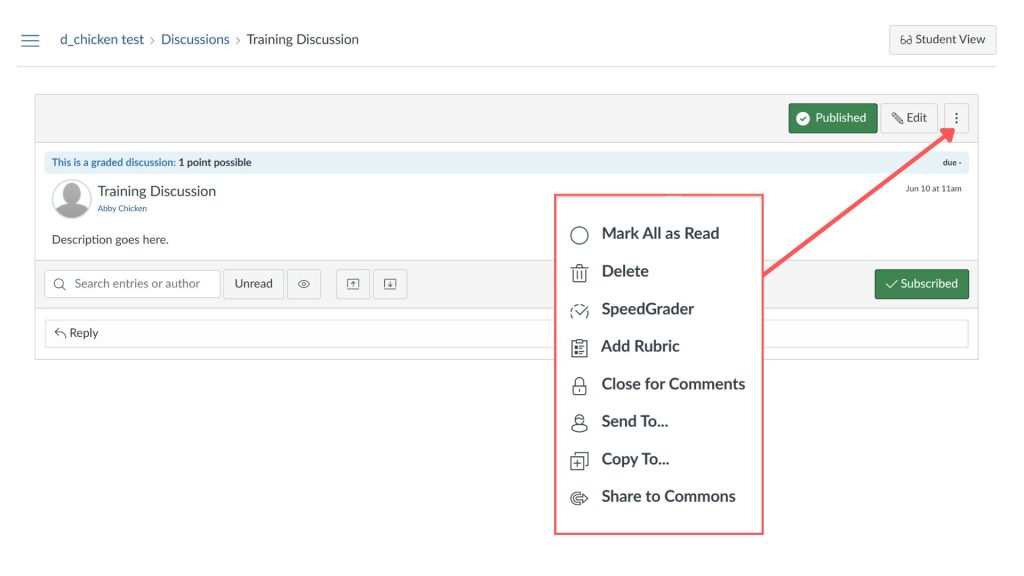
Once the discussion is saved, it will look somewhat like the image below with the title, author, description, and the reply field visible on the left and a few buttons available on the right. In the case of the tutorial, we will direct you to the triple dots button. By clicking this button, you will gain access to a number of actions you can perform on this discussion. These include marking all responses as read, deleting the discussion, opening SpeedGrader (for a graded discussion), adding a rubric (for a graded discussion), closing the discussion for future comments, sending the discussion, copying the discussion, and sharing to Commons. For a Q&A (if you are going the normal ungraded route) you will not need to use any of these features, but it is good to know they are there if you need them.
Top Hat Discussions
Top Hat is an ICON integration where instructors create interactive presentations, and students answer questions in real time through their cell phones, laptops, or tablets. You can use this to check students’ comprehension and direct classroom discussions.
To order Top Hat for your classroom, you’ll have to submit an order through ICON Direct. Student accounts are $10 per semester. Instructor accounts are free. For more information on ICON Direct, visit Chapter 15: ICON Direct.
Here, we’ll cover Top Hat’s discussion section, which you can use as a tool to direct conversations about class procedures, if you’d like.
To log in to Top Hat, click the Top Hat tab on your course navigation menu. You’ll be prompted to log in. Make sure to select Instructor account and use your HawkID.
Tip: You might have to enable Top Hat in your course navigation settings. (Make sure to use the original Top Hat version and not Top Hat – New.) For more information on customizing your CourseNav menu, visit Chapter 4: Your Course Navigation Menu.
On the home screen, click the blue Create button. From the dropdown menu, select Discussions. Finally, input the title and description, set grading options, and choose response and participant anonymity settings. Once you click the Save button in the bottom right corner, you’ll return to the home screen, where you can present your discussion.
The next screen will show the Join Code, where students can access the discussion from their own devices. Click on Start Presentation to begin the presentation.
Tip: You can also assign discussions on Top Hat without presenting them. Once you assign discussions in Top Hat, you can’t present them. But, if you plan to grade these discussions, it might be best to make them on your ICON site directly.
Padlet
Padlet is an online content builder where instructors and students can create boards and edit them together in real time. You can add videos, documents, photos, links, recordings, and more.
To create a padlet, you’ll have to create a free account. Then, on the home page, you can create a board that seems relevant to you. To add posts to the board, click the + button at the bottom of your board.
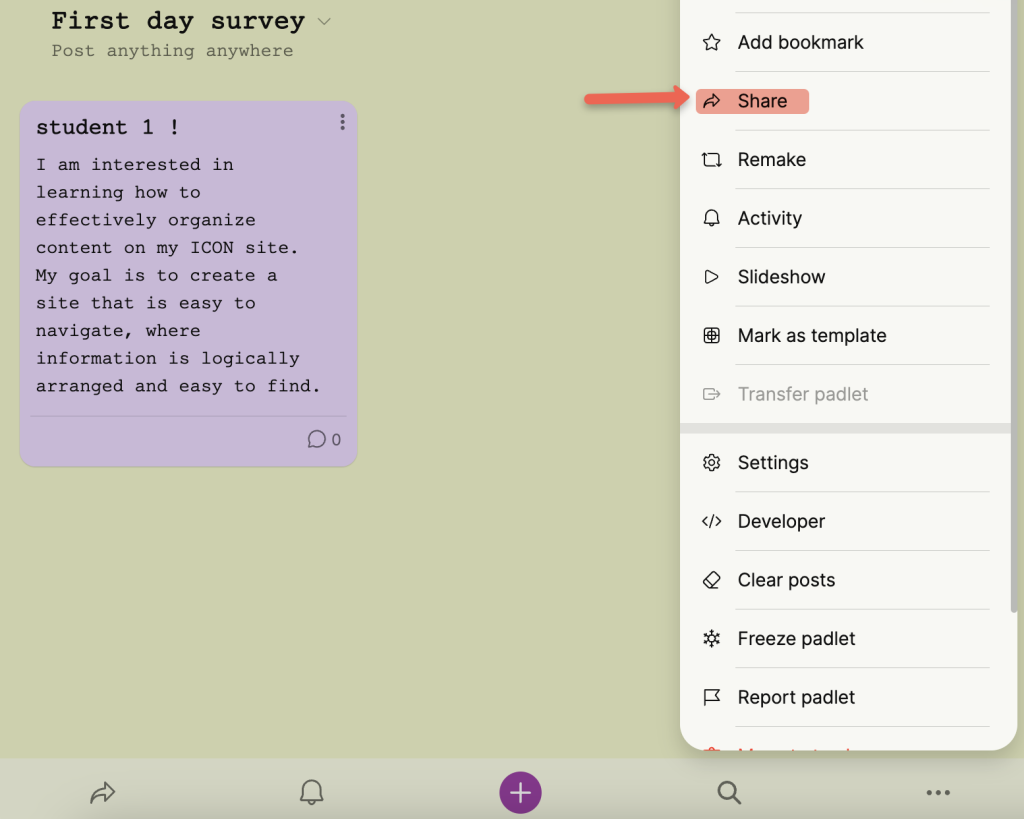
To share this board with your students and create a discussion in real time, click on the three dots in the bottom right corner and choose Share from the dropdown menu.
Helpful Resources
OTLT Web Guides:
From the Canvas help site:
- How do I create a discussion as an instructor?
- How do I create a group discussion in a course?
- How do I grade a graded discussion in SpeedGrader?
From the Top Hat help site:
From the Padlet help site:
Still have questions? Book consultation with a SITA!
SITAs work one-on-one with instructors on projects that enhance instruction with technology. We’re with the Office of Teaching, Learning, and Technology, which provides expertise, tools, and services to optimize teaching and learning through learning sciences research, ICON, teaching and learning data, and advanced classroom and instructional technology.
You can schedule an appointment or email us at sita@uiowa.edu.