
7 Creating Quizzes
Next, we’ll learn how to make a quiz on ICON. First, we’ll go over creating your quiz and setting quiz options. Then, we’ll learn how to add questions to our quiz.
Creating your Quiz
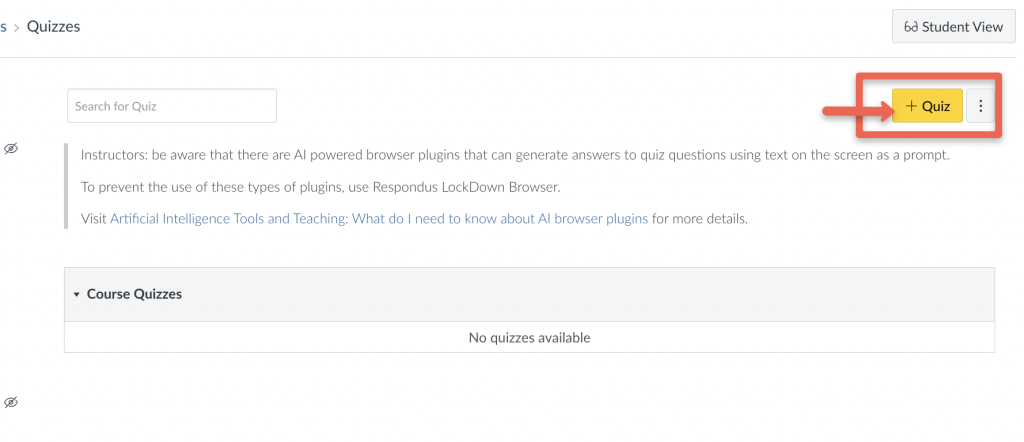
When you open your Quizzes page or the first time, it will look like this. Click the yellow +Quiz button to make a quiz.
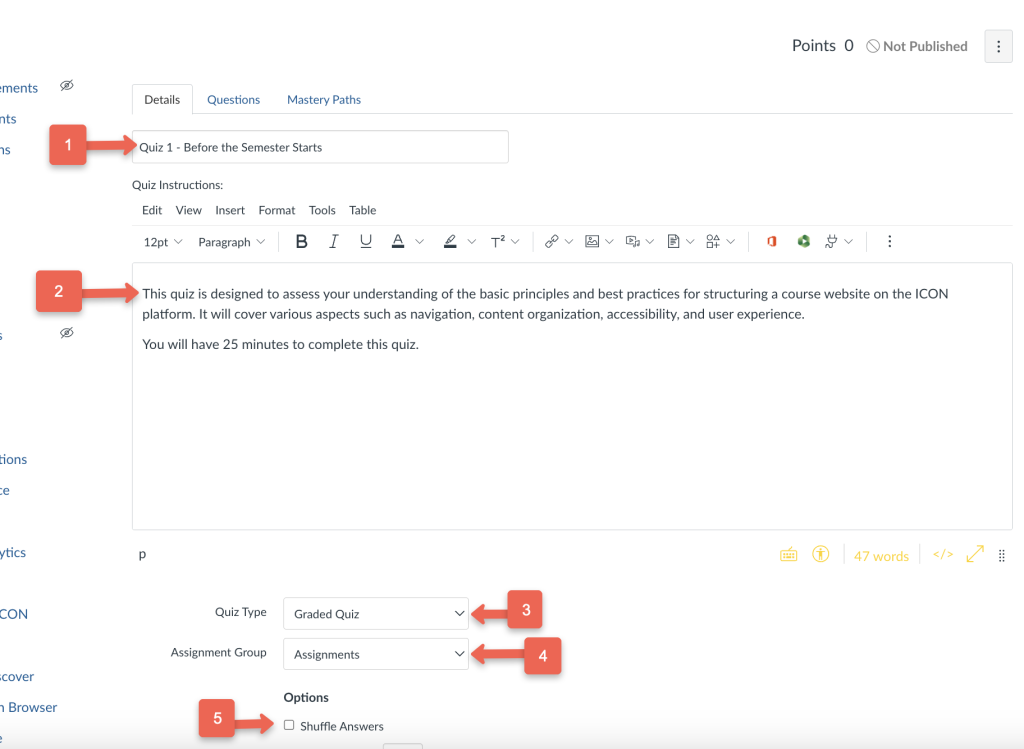
On the next screen, you’ll give the quiz a name (1) and a description (2). Then, you’ll decide whether you want to make this quiz a practice quiz, a graded quiz, a graded survey, or an ungraded survey (3). Next, you’ll decide which assignment group this quiz belongs to (4). Then, you can decide whether or not you’d like to shuffle the quiz answers for each student (5).
When you scroll down, you’ll see a number of options to customize your quiz:
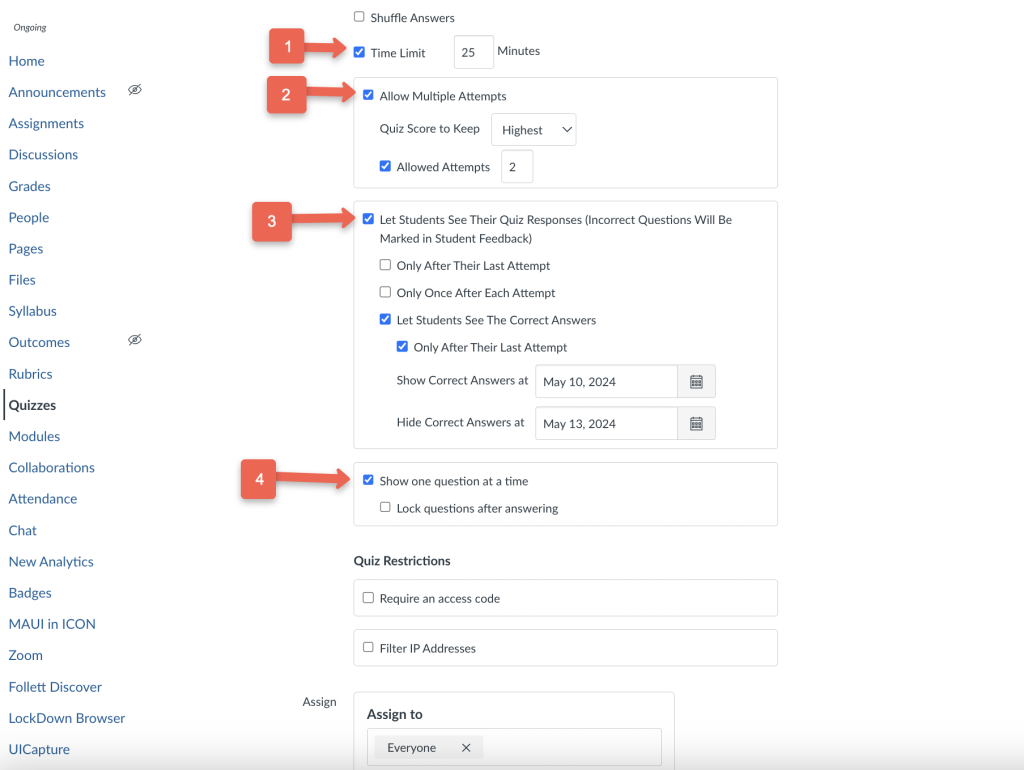
- If you want to set a time limit, click the blue checkmark below the shuffle answers box and to the left of the minutes box. Then enter the number of minutes your students will have to take the test. If you want a test that lasts longer than an hour, no worries! Just be sure to convert hours to minutes.
- Here, you’ll decide if you want your students to have multiple attempts at the quiz by clicking the checkbox on the far left. You can choose to take their highest score, their most recent score, or the average of all their scores. You can enter the number of attempts next to Allowed attempts.
- Here, you’ll decide whether or not you’ll allow students to see their quiz responses. You can decide if you want them to see it after their last attempt or after each attempt. You can also choose to let students see the correct answers. You can set the date that students will see the correct answers. You can also hide these answers at a future date.
Tip: In most instances, you’ll want to set the date that students will see the correct answers sometime after the quiz has closed. That way, students who have already taken the quiz won’t be able to share the correct answers with their classmates who haven’t.
- In this box, you’ll decide if you want to show one question at a time, and if you’d like to lock each question after answering.
In the following boxes, you can also filter the IP addresses that can access your quiz. You can also require an access code. These steps are usually only necessary if you want to secure your quiz without using Respondus Lockdown Browser.
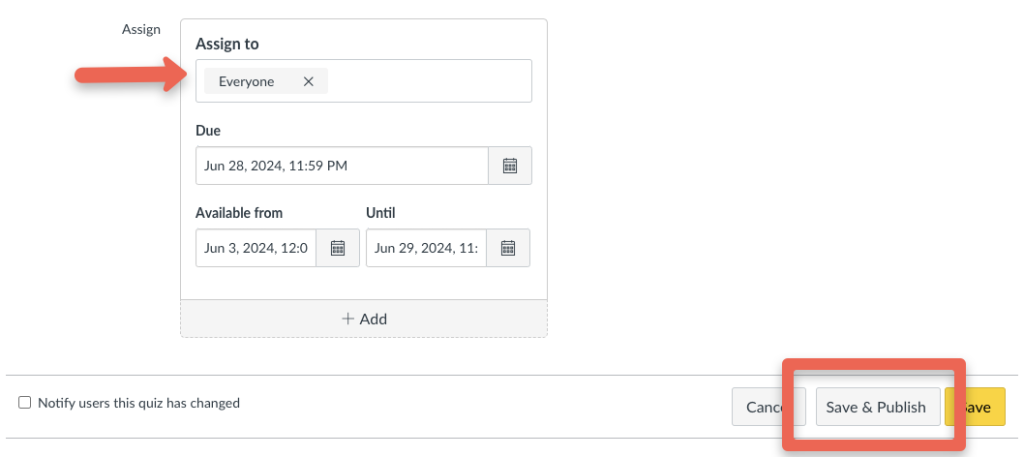
Finally, you’ll assign your quiz! In the final Assign box, you’ll choose whether to assign it to everyone, a group, or just one student. This is also where you’ll set the due date and availability. When you’re done, hit Save and Publish. If you’re not ready to publish your quiz just yet, click Save.
Adding quiz questions
To add quiz questions, click the Questions tab next to the Details tab. Then, click +New Question.
Tip: You can also create a question group to randomize questions. With this option, you’ll create several questions per group, and ICON will automatically pull one question from the group. This way, students will be assigned different questions, which can help deter academic dishonesty. To create a question group, click +New Question Group.

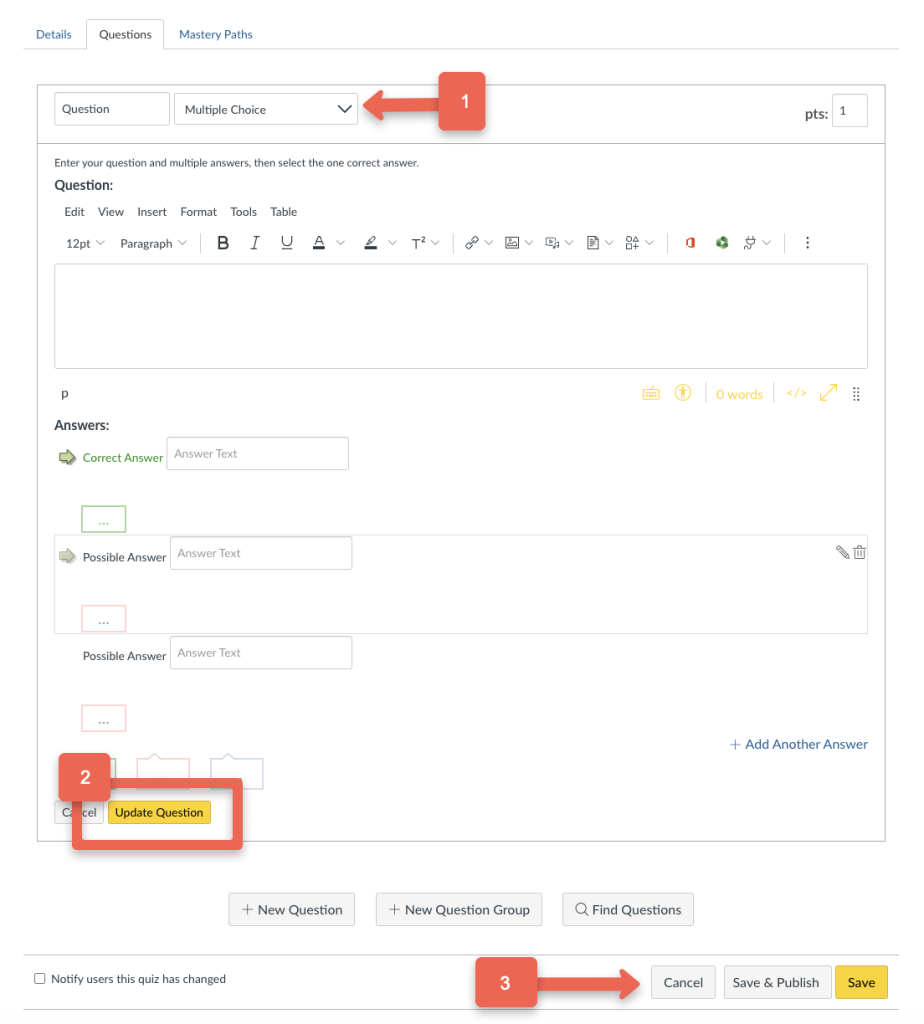
You’ll see the following screen.
- In the dropdown menu, you’ll choose what kind of question you’d like to insert: multiple choice, true/false, fill-in-the-blank, numerical answers, formula answers, and more.
- To save your question, click Update Question. This will save your question. If you need to edit it later, you can return to the question and click the pencil icon.
- When you’re ready to save all your questions, make sure to click Save in the bottom right corner. If you’re ready to publish, click Save and Publish.
Tip: Make sure to hit Update Question! Otherwise your question won’t save, not even if you hit the gold Save button in the bottom right corner. Update Question saves individual questions, and Save saves the questions that you just created.
You can always edit your quiz by returning to the Quizzes page and clicking on the three dots on the far right side of its titular tab.
Happy ICONing!
Helpful Resources
OTLT Web Guides:
From the Canvas help site:
Still have questions? Book consultation with a SITA!
SITAs work one-on-one with instructors on projects that enhance instruction with technology. We’re with the Office of Teaching, Learning, and Technology, which provides expertise, tools, and services to optimize teaching and learning through learning sciences research, ICON, teaching and learning data, and advanced classroom and instructional technology.
You can schedule an appointment or email us at sita@uiowa.edu.